Chatbots (III): The magic of creating chatbots without Visual Studio thanks to FormFlow

Chatbots, conversational interfaces, that started their hype two years ago are really funny but they aren’t always useful. Design a conversation having in mind all different possible options needs a lot of effort. Is it necessary to manage all possible inputs in order to manage a simple business task? Thinking about most of the apps, the answer is «no», else we wouldn’t have a lot of apps based on forms getting information to do something.

[En castellano]

Microsoft gives us, inside Bot Framework, an easy way to model tiny business functionalities that in other environments we would resolve using a simple form. FormFlow is an engine that, using a data model, can automatize a conversation to get all the information needed to fill the model and allow us to do whatever we want with the data.

Thanks to it we can use the omnipresence of chatbots to be more near to our public (because chatbots are in a lot of channels in which users are already present).

Let’s go to see how we can deploy a simple chatbot inside Azure. You will see that using FormFlow is so easy so we don’t need to open Visual Studio to code it. It will be like magic! We are going to do an emulator of the Sorting Hat from Hogwarts who decided, in J. K. Rowling stories, to what house the students of the school of magic were going.

It is a really easy example, but full of functionalities and details, that is going to be useful as a base to make any simple app that needs to get some data with which do something: calculate something (like in this case but also it could be calculating a loan conditions or the price for a car insurance), call to an API (for instance in order to record a request for a loan, or to request a call from a salesperson), or whatever comes to mind.

As most of the bot is based on the data model definition it will be an easy task no matter how complex it was, because the magic is coded by Microsoft inside FormFlow.

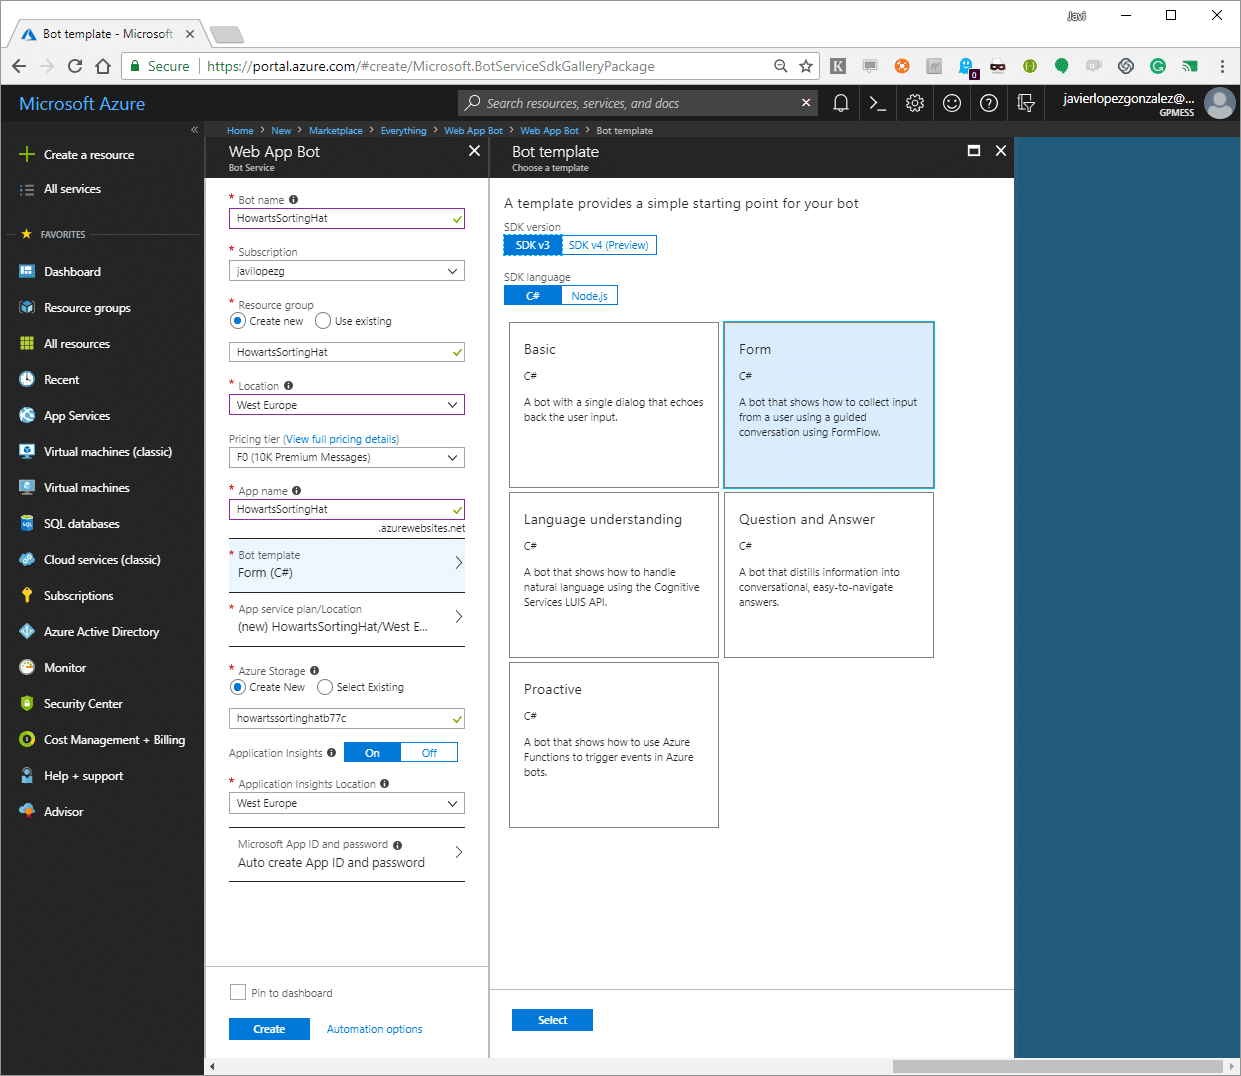
Our first move has to be creating a new bot over Azure (Web App Bot). To get the easy way, let’s use an example bot, so when we are creating the app we will tell to Azure that has to use the FormFlow template.

When it was deployed, we will have two elements with the same name: a Web App and the Web App Bot. Inside the Web App Bot options, we can find one (under Build menu) to edit code online, that’s the one that we will use to edit our bot’s code because it’s so simple that we don’t need to do complex things.

Bots based on FormFlow use a model, so we have to define one. Our Sorting Hat isn’t so magic like the one from Hogwarts, ours gets information from students in order to take a decision.

Fields of our model can be from basic types (integers, floating point numbers, strings, DateTimes, enumerations) and lists of enumerations. In our case, we will start only with enumerations because values that we will manage are too specific to our domain.

 public enum Nombres {
  Godric,
  Helga,
  Rowena,
  Salazar
 };  
 public enum Cualidades {
  Valentía, 
  Honestidad,
  Inteligencia,
  Ambición
 }; 
 public enum Colores {
  Rojo, 
  Amarillo,
  Azul,
  Verde
 }; 
 public enum ColoresDeJoyas {
  Oro,
  Negro,
  Bronce,
  Plata
 }; 
 public enum Animales {
  Leon,
  Tejon,
  Aguila,
  Serpiente
 }; 
 public enum LugaresParaVivir {
  TorreOscura,
  Bodega,
  TorreLuminosa,
  Mazmorras
 }; 
 public enum Titulos {
  Sir,
  Fraile,
  Dama,
  Barón
 }; 
 public enum Amigos {
  Ron,
  Neville,
  Hermione,
  Harry
 }; 
 public enum Accesorios {
  Espada,
  Copa,
  Diadema,
  Guardapelo
 } 
 [Serializable]
 public class SortingTest
 {
     public Nombres? Nombre;
     public Cualidades? Cualidad;
     public Colores? Color;
     public ColoresDeJoyas? ColorDeJoyas;
     public Animales? Animal;
     public LugaresParaVivir? LugarParaVivir;
     public Titulos? Titulo;
     public Amigos? Amigo;
     public Accesorios? Accesorio;

     public static IForm<SortingTest> BuildForm()
     {
         OnCompletionAsyncDelegate<SortingTest> evaluate = async (context, state) =>
         {
              await context.PostAsync(“OK”);
         };
         return new FormBuilder<SortingTest>()
                  .Message(“Hola”)
                  .OnCompletion(evaluate)
                  .Build();
     }
};

If you also want to manage new information like the name or the birth date, you only need to add new properties to our model that bot will manage and validate for you.

    public string TuNombre;
    public DateTime? FechaDeNacimiento;

As soon as we have our class model defined, we only have to add this to our project creating an online file and we can also delete the example model that is not related to our magic world.

We also have to do some minor changes in the controller to allow it use our new model instead of the one we deleted. The file name is MessagesController.cs and we will change references to the model on MakeRootDialog method.

    internal static IDialog<SortingTest> MakeRootDialog()
    {
        return Chain.From(() => FormDialog.FromForm(SortingTest.BuildForm));
    }

From this point, we can compile (build.cmd) and test our bot. Again, inside Web App Bot options we have one to test our bot using a web client without leaving Azure Portal. As soon as we say «Hi» it will answer us and we could see it asking us to fill the model.

When we are capturing all the data, we only have to process that and to do this we will change code inside BuildForm method of our SortingTest. If we test it again, we will see that we already have all working. However, it’s not very beautiful that if our bot is made for Spanish speakers it speaks in English. FormFlow is ready to localize it to different languages but in our case only will change some details using attributes over our model.

There are attributes for many things. For instance, we can set optional fields or create our very own validations. We will use a template attribute to change the question that is made for each field.

    [Template(TemplateUsage.EnumSelectOne, "Elige un {&} {||}", ChoiceStyle = ChoiceStyleOptions.Auto)]

There is a full language to edit messages format. In our case, {&} characters represent the field name and {||} characters different options for the user. The ChoiceStyleOptions enumeration allows us to indicate how options are shown.

If we would test again we will see that it is more elegant, but it is not elegant at all because of some language conflicts. For instance «Cualidad» is female and the question is not neutral so it’s not well-formed for female names. It’s the same for string and DateTime properties for what we didn’t change their template. We can use a similar attribute that is applied to one only property.

    [Prompt("Elige una cualidad {||}")]

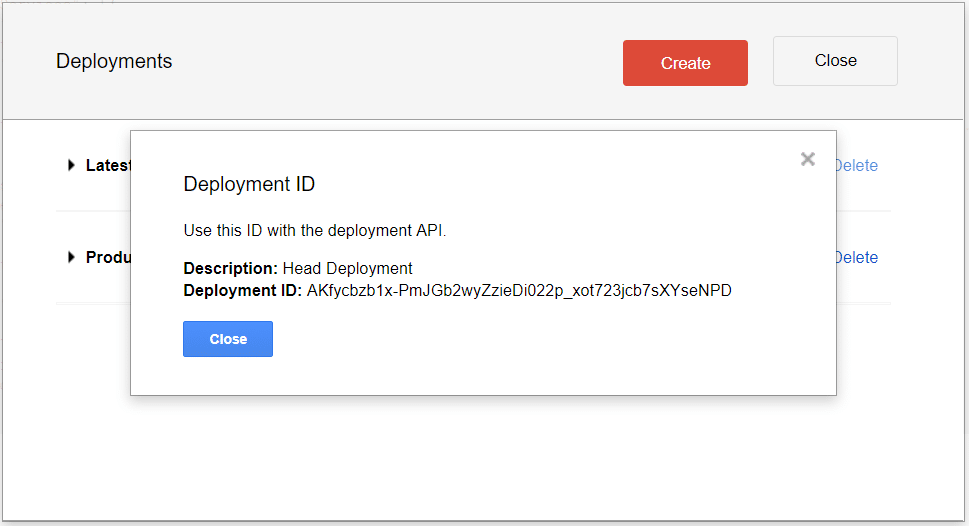
FormFlow has more capabilities but with these, we could do some «tech magic» in few minutes to get something beautiful and functional. We only have to select one or more channels to publish it to start reaching our public just in the channel they are working daily. For instance, if you want to know what the Sorting Hat is thinking about you, you only have to visit javilopezg.com/SortingHat and talk to it.

Chatbots (II): How to make your phone read to you Hacker News (also contents)

Following the post series about Chatbots, I did an app to make Google Assistant allows you navigate using your voice throw Hacker News (Y Combinator‘s tech news forum) and listen to the body of the news in which you are more interested.

[En castellano]

If you are only interested in using it, you only have to talk to Google and say «Talk to Hacker News Reader«. However, if you want to know main points to be able to do something similar using few hours and few lines of code stay tuned: we are going to see the 6 human characteristics that are really easy to get using Dialogflow.

Dialogflow is a Google platform (formerly API.ia) that allows us to create chatbots in an easy way.

It is so powerful that allows us to do a lot of things without a single line of code.

For instance, it has integrated a natural language processing system. If you give it few training examples, it will know what our users are trying to say, driving them to different parts of our chatbot in order to give them the correct answer.

So, it will allow us to give human capacities to our chatbot in a really easy way.

1. Listening

Intents are the main component of a chatbot inside Dialogflow. It is something like a conversation unit, it is each part that our system can understand and give an answer.

Dialogflow allows us to set events and other parameters that will launch an intent. Especially, it allows writing different sentences in order to guide the chatbot. When it will detect those it will know that that is the intent it has to launch.

It also allows writing different responses that it will launch randomly avoiding you from writing code.

2. Understanding

A chatbot picking out actions based on sentences without a single line of code is great but not powerful enough. In the end, listening sentences is not the most important but understanding the concepts that are wrapped inside them.

When you are typing example phrases, you are allowed to select some words to say the platform that they are something important and that it should abstract them from single values.

At the moment in which the language understanding motor detects some of the entities that we had mapped to variables, it will extract them and send them to us as parameters in each request.

The system is ready to understand a lot of different things, but it allows us to define our own entities in order to model exactly what we want. For instance, I created an entity with different sections from Hacker News: top, new, best, ask, show and job. Then, the system can understand that a user wants that jobs uploaded to Hacker News to be read.

3. Intelligence

If intents’ answer options are not enough, we can create our very own web service to answer request understood by the system.

Google offers some libraries and using them, create a service in any language on any platform would be really easy. However, for small things like Hacker News Reader we can code right inside the platform using node.js. This code will be deployed to Firebase only with one click.

When you are thinking about things you can do you must think that coding a service (on Firebase or anywhere) you can do literally anything.

That is, you don’t need to only use APIs to access contents because you don’t have cross-origin restrictions. You have the whole Internet in your hands.

For instance, my action allows users listen to news linked from Hacker News. To do this, it downloads the web page (like a browser) and processes that to extract contents (I didn’t a hard work, it could be better).

4. Analysis

In order to use the inline editor, we have to attend some restrictions like the one that says that «dialogflowFirebaseFulfillment» must be the name of our function if we want an automated deployment.

However, thanks to Dialogflow listening and understanding, when we are giving it some intelligence we will have really easy to give analysis capacities of requests received for our chatbot.

Map each intent to functions developed by ourselves is really easy. Intents function is listening so they will say us what a user wants.

We could also access parameters understood by the system thanks to entities (understanding).

exports.dialogflowFirebaseFulfillment = functions.https.onRequest((request, response) =&amp;gt; {
    const agent = new WebhookClient({
        request,
        response
    });
    //...

    function read(agent) {
        var number = agent.parameters.number || 0;
        //...
    }

    let intentMap = new Map();
    intentMap.set('Default Welcome Intent', welcome);
    intentMap.set('Repeat', repeat);
    intentMap.set('Back', repeat);
    intentMap.set('Read', read);
    //...
    var promise = null;
    try {
        promise = agent.handleRequest(intentMap).then(function() {
            log('all done');
        }).catch(manageError);
    } catch (e) {
        manageError(e);
    }
    return promise;
});

5. Answering

To give to our chatbot answering capacity we only have to use add method from WebhookClient. We can pass as params text, user answer suggestions or rich text cards where we can embed images, use emoticons, etc.

Keep in mind that some devices where your action may be executed could not own a display or a browser. It’s important if we want a strictly conversational interface, so we should avoid visual elements to help to our bot only with words.

6. Memory

The most disgusting thing in a conversation is having to repeat every time what we are saying so, it is really important that our bot remember what user said in previous interactions of our conversation.

For this, we will use contexts. Contexts are an element managed by Dialogflow to help to choose between intents in order to launch the correct one. They could be used to know if a client device has a display available, for instance.

Their use is not very well documented, but when you debug basic methods you see that it is trivial use them to save information between each conversation turn.

    //...
    var context = agent.getContext('vars');
    var vars = context ? context.parameters : {
        ts: (new Date()).getTime() % 10000,
        items: [],
        pointer: 0,
        list: 0,
        //...
    };
    //...
    agent.setContext({
        name: 'vars',
        lifespan: 1000,
        'parameters': vars
    });
    //...

With these 6 human capacities, you own the keys to do something similar by your own and provide a lot of functionalities to Google Assistant.

I hope they may be useful for you, the action and the information provided in this post. If yes, please share and spread the word.

We will continue with other systems that allow us to do chatbots in an easy way and with how to integrate our chatbots into other channels.

Chatbots (I): Build an app to talk to your phone without coding

A posts series about chatbots starts today with a direction but without a clear destination.

Today we are going to see a really easy way to create an app that allows you (writing like in a chat or speaking) talk to your phone without coding, without a single line of code!

[En castellano]

A lot of you already would had used Google Assistant. It is the «Siri» from Google which you could access on Android phones saying «Ok, Google».

Nowadays it also works on iOS phones, on Google Home, on smartwatches, on cars, on TVs, …

By the way, Google (attending the developer community program I spoke about two months ago) mailed me about they are gifting me a Google Home thanks an app I built following this method, using only a few hours. Do you want do the same?

When you access the actions console («actions» is the name given to Google Assistant apps) you can add a new project and Google gives you some options. You can code everything using its API, you can use an advanced platform in which you can code but it gives you a lot of work done (it is named DialogFlow), or you can use templates Google provides.

As you see in the above image, there are 3 different templates:

  1. Trivia. This template allows you create a quiz. You can provide different answers and synonyms for this answers also for each question. It is ready to load contents in English, French, German and Japanese.
  2. Personality Quiz. This template is ready to create personality quizzes. For instance, you can create a quiz like the one used by Cambridge Analytics (the company that had problems with Facebook’s privacy) to get data about millions of Americans and to affect USA elections. For the time being, you can only use this to create English content.
  3. Flash Cards. This is a template that for the moment only allows you create English content. It drives you to build a teaching game to learn about things.

The first step (but with the second that doesn’t allow this option) you have to choose the kind of personality. It means that you are choosing a voice from a woman, a man or a robot. Your election is also affecting to accent, expressions and sound effects that your application is going to use.

It is really important that you copy the Google Sheets template in the second step, the one about content. If you build your sheet from a clear one, it is difficult to achieve all restrictions checked by validations coming.

Using the template you are allowed to change whatever you want to adapt it to your content, but it is really important that in the second sheet (that is ready to set different configuration params) you change the title of your application, in order to avoid conflicts with other apps created before.

Whenever you are done following this wizard (the form that takes you throw a step by step process, for the ones that are not inside the apps design and development world), you only have to follow the Overview one to set how your apps are going to be called, set descriptions, icons, etc. etc.

Done this, you are ready to send your draft to the validation process and whenever it was approved your users will be able to say to their phones «Talk to…» and magic will start.

All in one serverless solutions

There are a lot of platforms and applications that are providing serverless capabilities to our developments, avoiding us of thinking a lot about servers.

You can find services for serverless storage, serverless notifications, mailing, payments, forms, but it could be quite difficult integrate all of them into one single solution. What is the best way to have all possible functionalities in one only place and don’t do a lot of work?

all in one photo

Actually, you are able to use a lot of serverless functionalities from wide platforms like Google Cloud, AWS or Azure. Did you remember that article about Azure Serverless? That platform has a lot of high-level functionalities and services that can allow you don’t think about machines, operating systems, RAM, network, etc. when your app needs to scale. But the problem is almost the same, you have all those functionalities in a single platform but you have to do a lot of work to integrate them into one single solution.

There are some platforms that are ready to start working, providing you a lot of capabilities that are planned to work together. They could not be the best in performance or other facets, but they are really god to prototyping and to start working on your MVP accelerating your development. This is because they just work. Some of those are the following:

  • Firebase: Real-time database, authentication, hosting. A powerful platform for your mobile or web application.
  • Backendless: Real-time database, authentication, hosting.
  • Stamplay: «IFTTT For Back-End Development«.
  • Kinvey: Build your digital business faster with mobile Backend as a Service.
  • Syncano: An all-in-one platform to create real-time apps without a server.
  • Hoodie: Hoodie is a complete backend for your apps: develop your frontend code.
  • Para: Flexible and lightweight backend service for rapid prototyping, based on open source software.
  • Wolkenkit: It is a CQRS and event-sourcing framework for JavaScript and Node.js which fits perfectly with domain-driven design (DDD).

Did you know all of them? Look over them and be ready to run developing your next app, and if they are not complete enough for your needs, look for what you need. The Internet is full of serverless services.

Get to the point with Solidity

As I explained in my previous post about coding for Ethereum, there are a lot of ways to learn Solidity. However, most of them are really humdrum if you already know how to code, almost if you know javascript. So, let’s get to the point with Solidity looking the simplest structures you need to start coding.

ethereum photo

Solidity is based on javascript, but it also owns structures from other functional languages like Haskell and from object-oriented languages like Java. To do Dapps you need more than knowing the language because you need to know about patterns, security, how to compile and publish, and what actions cost more gas than others. Also, Solidity owns more reserved words than the explained below and more complex structures like inserting assembly inline, but with a little base of javascript and reading the following script (just 242 lines) you will be ready to start the backend of your very own distributed application over the Ethereum Virtual Machine.

pragma solidity ^0.4.19; //Version of the compiler

import "./otherContractsFile.sol";

contract ContractName { //Declaration of the basic unit of code
   /***Variables and funtions***/
   bool boolVariable;
   uint unsignedIntVariable;
   int intVariable;
   int intVariableWithValue = 10;
   uint16 unsigned16BitInt;
   uint256 unsignedIntVariable2;
   ufixed unsignedFixedVariable;
   fixed128x19 fixedVariableWith128bitsAnd19DecimalPoints;
   string stringVariable = "It can store any UTF-8 encoded string";
   address addressVariable; //addresses are used to store user accounts and contracts identifiers
   var aVariable = intVariableWithValue; //aVariable is defined as an int variable
   uint constant lustrum = 5 years;

   /*State variables are permanently stored in the EVM
    *between external function calls for this contract. 
    */
   uint stateVariable;

   function doSomething(uint uintParam) {
      /*Variables declared inside functions
       *are stored in memory and they are reset 
       *between different calls to the function.
       */
      uint functionVariable;
      
      functionVariable++;
      stateVariable = stateVariable + functionVariable;
      /*functionVariable = 1
       *stateVariable = 1 the first time this function is executed,
       *2 the second time this functions is executed, 3 the third, ...
       */
   }

   /***Collections and your own types***/
   uint[2] fixedArray;
   uint[] dynamicArray;
   mapping (address => uint) mapFromAddressToUint;

   enum EnumType {
      FirstValue,
      SecondValue,
      ThirdValue
   }

   struct StructType {
      uint uintField;
      string stringField;
   }
   StructType structVariable;
   StructType structVariableWithValue = StructType(10, "something");
   StructType[] structArray;

   function manageStructArrayByValue() {
      /*This variable is asigned by value (a copy is done)*/
      StructType memory myStruct = structArray[0]; 
      myStruct.uintField = 10; //structArray[0].uintField = 0;
   }

   function manageStructArrayByReference() {
      /*This variable is asigned by reference (a pointer is created)*/
      StructType storage myStruct = structArray[0]; 
      myStruct.uintField = 10; //structArray[0].uintField = 10;
   }

   uint[] public publicArray; //A public array is read-only publicly accessible by other contracts
   mapping (uint => string) public publicMap;

   function workWithArrays() private {
      uint[] myArray;
      myArray.push(1); //myArray = [1]
      myArray.push(2); //myArray = [1,2]
      uint newLenth = myArray.push(1); //newLenth = 3, myArray = [1,2,1] 
   }

   /*Functions are public by default, so you need to set them private
    *in order to keep your contract secure. In other case, functions
    *can be called (and executed) by other contracts.
    */
   function doSomethingPrivate(uint uintParam) private {
      //some code
   }

   /*Internal functions are functions that can be called from
    *contracts that inherit from this one.
    */
   function doSomethingInternal(uint uintParam) internal {
       //some code
   }

   /*Public functions can be called from anywhere.*/
   function do(uint param) public {
      //some code
      doSomethingPrivate(param);
      doSomethingInternal(unsignedIntVariable);
      doSomethingPrivate(10); //Can't call to doSomethingExternal
   }

   /*External functions can be called from external contracts
    *but not from inside this contract.
    */
   function doSomethingExternal(uint param) external {
      //some code
   }

   function ContractName() public { //this is a constructor but be carefull using them, they are not executed in some special cases
      //do something
   }

   function return10() returns (uint) {
      return 10;
   }

   function returnMultipleValues() returns (uint value1, uint value2) {
      value1 = 10;
      value2 = 20;
   }

   function returnMultipleValues2() returns (uint, uint) {
      return(10, 20);
   }

   function useMultipleValues() {
      uint value1;
      uint value2;
      (value1, value2) = returnMultipleValues();

      uint value4;
      (,value4) = returnMultpleValues2();
   }

   /*function throwsAnError(int a) private returns (int8) {
    *   return a + 1;
    *}
    */

   function addAndConvert(int a) private returns (int8) {
      return int8(a) + 1; //uses the 8 less significant bits of a
   }

   function addAndConvertIfIsInt8(uint a) private returns (uint8) {
      require(a <= 2 ** 8); //Throws an error if false
      return uint8(a) + 1;
   }

   /***Events***/
   event sthOccurred(uint param);

   function throwEvent() private {
      sthOcurred(10);
   }

   /***Modifiers***/
   //"view" can be used to identify functions that are not changing any data
   function returnInt() public view returns (int) {
      return intVariable;
   }

   //"pure" can be used to identify functions that do not access any data in the contract
   function add(int a, int b) public pure returns (int) {
      return a + b;
   }

   //"payable" is needed in order to receive Ether with a call
   function aFunctionThatCost() public payable {
      //this contract will own the ether sended at the end of the execution
   }

   modifier myModifier() {
      //some code to be executed before the function
      _; //this is a placeholder that indicates the point where the code of the function will be executed
      //some code to be executed after the function
   }

   function functionWithModifier() public myModifier {
      //some code to be executed in the place where the placeholder is set inside modifier's code
   }

   function otherFunctionsAndValues() private {
      keccak256("qwerty"); //returns a 256-bit hexadecimal with a SHA3 hash of the param
      //"qwerty" == "QWERTY"; Solidity can't compare strings. Instead you can do
      keccak256("qwerty") != keccak256("QWERTY");

      uint currentUnixTimestamp = now;
      1 minutes == 60;
      1 hours == 3600;
      //you also have available "days", "weeks" and "years" units

      address currentBlocMiner = block.coinbase;
      uint currentBlockDifficulty = block.difficulty;
      uint currentBlockGasLimit = block.gaslimit;
      uint currentBlockNumber = block.number; 
      uint currentBlockUnixTimestamp = block.timestamp;
      bytes32 theHash = block.blockhash(block.number); //only works for 256 most recent blocks excluding current
      bytes completeCallData = msg.data;
      uint remainingGas = msg.gas;
      address callerWhoInitiatesThisExecution = msg.sender;
      bytes4 firstFourBytesOfMsgData = msg.sig;
      uint numberOfWei = msg.value;
      uint gasPriceOfTheTransaction = tx.gasprice;
      uint senderOfTheTransaction = tx.origin;

      assert(1==2); //like require but for internal errors
      revert(); //abort and revert changes
   }

}

/***Inheritance and rehusability***/
contract A {
   function aFunction {}
}

contract B is A {
   function bFunction {
      aFunction();
   }
}

/*If you want to use an external contract, you need to define an
 *interface with the definition of the methods that you want to
 *use.
 */
contract InterfaceOfExternalContract {
   function functionExternalDefinition(uint param) external return (uint);

   function functionPublicDefinition(uint param) public return (uint);
}

contract ContractWichUsesTheExternalContract {
   address externalContractAddress = 0x...;
   InterfaceOfExternalContract externalContract = InterfaceOfExternalContract(externalContractAddress);

   function aFunction() {
      uint value = externalContract.functionExternalDefinition(1);
   }
}

And now, what are you starting to code?

Facebook is listening to you, what can you do to avoid this?

Nowadays, a lot of people is talking about a «conspiracy» that Facebook is denying constantly. Is Facebook listening to us? What can we do to avoid this? Let’s see what are the questions and the answers:

What is people saying?

People say that Facebook apps installed on our mobiles are recording our conversations, analyzing what we say and using this to target their ads.

What is the response from Facebook?

Facebook denies all of those accusations.

Is it technically possible?

Well, record all conversations and send them requires a lot of bandwidth. We are not talking about Echelon, neither recordings made by Google Now assistant. We are talking about all the conversations you maintain all the time, all the dialogues from the TV shows you are seeing and conversations from people near you.

What is the bandwidth you bought from your provider? 1Gb? 3Gb? 10Gb? It doesn’t matter. It is not enough to listen Spotify constantly, so it is not enough to send recordings with your full conversations.

Some people are saying that they record the conversations, analyze those using your mobile phone resources and get keywords that they can send to Facebook servers.

This theory is better but battery consumption… I don’t know.

Does it really matter?

Facebook has all your written conversations, it is the owner of Facebook, Messenger, WhatsApp, Instagram, … It also owns your photos, videos, relations, … Facebook knows who is the first person who you talk every day, also knows what websites you visit and also the visits from your mom or your grandpa.

Facebook is not the only one who knows. Did you visit the link about Google records above? It’s the tip of the iceberg.

So it doesn’t matter if Facebook is listening and recording you. They know everything about you. All great companies know everything about you, so it doesn’t matter.

The only way you can follow to avoid this is become offline, at least offline from their apps and services. Are you prepared to be disconnected from your friends and family? If not, you can’t be safe.


Gmail Add-ons: How-to be on all desktops and mobiles with a simple app

Some weeks ago, Google opened the possibility of create Gmail add-ons for all developers. Let’s see what are the possibilities and how to create and distribute our own Gmail add-on.

This is not a very hard and abstract post, add-ons are something easy, so I hope my explanation to be simple too. It is based on an add-on created by myself that allows any user adding an email to Google Tasks (probably it is more useful than the add-on for MSN Messenger that I created years ago which read received messages with «real» voice). It is a functionality that has been always present on Gmail web client but that is not available on mobile clients.

In order to create a Gmail add-on you need to create a new Google Apps Script project. After that you can add as much scripts as you want to create an interface using Cards and the functionality to interact with other services, APIs and so.

For instance, in our example the functionality is very basic:


function getContextualAddOn(e) {
  var message = getMessage(e);
  var subject = message.getSubject();
  var permaLink = message.getThread().getPermalink();
  
  var card = CardService.newCardBuilder();
  card.setHeader(CardService.newCardHeader()
                 .setTitle('Save as task'));
  var section = CardService.newCardSection();
  
  var button = prepareSend(permaLink);
  section.addWidget(button);
  
  section.addWidget(prepareList());
  
  section.addWidget(prepareTitle(subject));
  
  section.addWidget(prepareDueDate());
  
  section.addWidget(button);
  
  section.addWidget(prepareSign());
  
  card.addSection(section);
  console.log("Open");
  return [card.build()];
}

function getMessage(e){
  var accessToken = e.messageMetadata.accessToken;
  GmailApp.setCurrentMessageAccessToken(accessToken);
  
  var messageId = e.messageMetadata.messageId;
  return GmailApp.getMessageById(messageId);
}

function prepareSend(permaLink){
   var action = CardService.newAction()
  .setFunctionName("saveTask")
  .setParameters({permaLink: permaLink});
  return CardService.newTextButton()
                    .setText("Save")
                    .setOnClickAction(action);
}

function saveTask(e){
  var res = e['formInput'];
  var task = Tasks.newTask();
  task.title = res["title"];
  task.notes = e['parameters'].permaLink;
  
  if(res["due-date"] &amp;&amp; res["due-date"] != "")
    task.due = res["due-date"] + "T00:00:00Z"
  
  task = Tasks.Tasks.insert(task, res["list"]);
  console.log("Saved");
}

function prepareList() {
  var response = Tasks.Tasklists.list();
  var taskLists = response.items;
  var dropdown = CardService.newSelectionInput()
     .setType(CardService.SelectionInputType.DROPDOWN)
     .setTitle("List")
     .setFieldName("list");

  if (taskLists &amp;&amp; taskLists.length &gt; 0) {
    Logger.log('Task lists:');
    for (var i = 0; i &lt; taskLists.length; i++) {
      var taskList = taskLists[i];
      Logger.log('%s (%s)', taskList.title, taskList.id);
      dropdown.addItem(taskList.title, taskList.id, i==0);
    }
  } else {
    Logger.log('No task lists found.');
  }
  return dropdown;
}

function prepareTitle(subject){
  return CardService.newTextInput()
                    .setFieldName("title")
                    .setTitle("Title")
                    .setValue(subject)
}

function prepareDueDate(){
  var d = new Date();
  var dd = new Date(d.setDate(d.getDate() + ( 7 - d.getDay()) % 7));
  return CardService.newTextInput()
                    .setFieldName("due-date")
                    .setTitle("Due date")
                    .setValue(dd.getYear() + "-" + (dd.getMonth() + 1) + "-" + dd.getDate())
                    .setHint("YYYY-MM-DD");
}

function prepareSign(){
  var button = CardService.newTextButton()
     .setText("@JaviLopezG")
     .setOpenLink(CardService.newOpenLink()
         .setUrl("https://javilopezg.com/")
         .setOpenAs(CardService.OpenAs.OVERLAY)
         .setOnClose(CardService.OnClose.RELOAD_ADD_ON));
  return CardService.newKeyValue()
     .setContent("Developed and maintained by")
  .setButton(button);
}

You also have to change script’s manifest. To do this you need to access to the menu «View>Show manifest file». Now you can modify it as you want, following our example you have to replace the content with following lines:

{
  "timeZone": "GMT",
  "dependencies": {
    "enabledAdvancedServices": [{
      "userSymbol": "Tasks",
      "serviceId": "tasks",
      "version": "v1"
    }]
  },
  "oauthScopes": ["https://www.googleapis.com/auth/gmail.addons.execute", "https://www.googleapis.com/auth/gmail.addons.current.message.readonly", "https://www.googleapis.com/auth/tasks"],
  "gmail": {
    "name": "Save as task",
    "logoUrl": "https://i0.wp.com/javilopezg.com/wp-content/uploads/2017/11/save-as-tag-ico-24.png",
    "contextualTriggers": [{
      "unconditional": {
      },
      "onTriggerFunction": "getContextualAddOn"
    }],
    "primaryColor": "#000000",
    "secondaryColor": "#888888",
    "version": "TRUSTED_TESTER_V2",
    "openLinkUrlPrefixes": [
      "https://javilopezg.com/"
    ]
  }
}

As soon as you save all changes you are ready to publish your add-on. Unfortunately the Gmail add-ons store is not publicly available yet. However, you can get the ID of your add-on and distribute it to your company co-workers in order to allow them install your add on in their gmail accounts. See images below:

Gmail Add-on ID
Gmail Add-on ID
Add-ons in Gmail settings

I know that it’s frustrating not being able to publish an add-on to all gmail users around the world yet. Anyway, I already have two cool ideas to implement as soon as I was able to distribute it at least to my friends. Something to draw an ordered tree of a conversation thread and an add-on to respond an e-mail with a video in an easy way. And you? What ideas are coming to your head?